Nonna's Spaghetti Master Post
- Jul 23, 2025
- 6 min read
Let's get started. This is the main post containing all of the information relevant to the spaghetti recipe. To begin, let's discuss the supplies you need.

Ingredients to buy at the store:
1 package of linguine or other pasta of choice
1 bulb of garlic, medium sized
Olive oil for cooking (not drizzling)
2 oz container of fresh basil
One pint of heavy whipping cream
One 6 oz can of tomato paste
One ~28 oz can of San Marzano D.O.P. tomatoes
One container of miniature fresh tomatoes of your choice (I use San Marzano again)
One package of ground Italian Sausage, Sweet or Hot
Red cooking wine (or red wine you have on hand)
Brown Sugar (light or dark)
Salt
A container of Parmsean cheese from the cheese section(not shown)
Non-food items required for recipe:
Stock pot for boiling pasta
Large skillet with deep sides for cooking the sausage and tomatoes
Medium-sized sauce pot for simmering the sauce
Two spatulas
Spaghetti ladle
Sharp medium-sized knife for chopping garlic
Pasta strainer
Can opener
A stove with at least 3 eyes
If you're not sure about whether the size of your pots are appropriate, pictures of the pots I most frequently use will be shown as I discuss the recipe. They don't need to be exactly the same size but look for something in the general vicinity.

The quality of the tomatoes you choose is important! When choosing a canned variety, I always recommend going for one that says "San Marzano D.O.P." San Marzano tomatoes are a special variety of tomato that only grow in a very small region of Italy where the soil is richly fertilized with volcanic ash. Learn more about San Marzano tomatoes here.
There isn't much variety in tomato pastes available at most grocery stores, but for your fresh tomatoes, there are usually quite a few options to choose from! I always go for the miniature San Marzanos shown in the picture. These are often sold at Publix. If you prefer a different grocery store, any miniature variety of tomato that catches your eye will work just fine. I also really like using "Twilight" tomatoes; they stand out due to their dark green and brown color.

Also important is to choose fresh basil, not dried basil for your recipe. You can find fresh herbs in the produce section of the grocery store. Usually the bigger containers of basil are placed at the end of a produce aisle or near the tomatoes. If the store is all out of large basil containers you can usually find smaller fresh containers against one of the refrigerated produce walls. If you have your own basil plant, you want to get around two big handfuls of basil.

Garlic is a foundational element of this recipe. Some people prefer more or less garlic; I am a big garlic fan! Here is a size reference to use when looking for your garlic bulb. If you have a lighter hand with your garlic, a smaller bulb will work just fine.
You want to make sure that you place all the non-perishable elements of your recipe out where you can easily access them. A perishable item is any item that needs to be refrigerated. You want your perishable items to be similarly organized, but keep them in the refrigerator until you need them.
Once your ingredients are gathered and organized, it's time to start your recipe!
The first step is to peel and finely chop your garlic. Click here for instructions on how to peel and chop garlic.

Here's, in my opinion, an adequate amount of garlic chopped to a nice thickness (one full bulb.) Some people prefer as little as as half the garlic I do. Some people like the garlic chopped more fine. It's really up to you when it comes to seasoning, but from my perspective you can never have enough garlic!

Before you chop up any other ingredients, it's a good idea to start heating up your olive oil. Pour your bottle of olive oil for about 5 seconds until you have close to the amount shown here. The important part is that you cover the bottom area of your pan with a decent amount of oil, around 3/4ths of a centimeter's thickness. Bring your stove eye up to medium height (around 4 or 5 usually) and wait for the oil to start shimmering before you put anything into it.
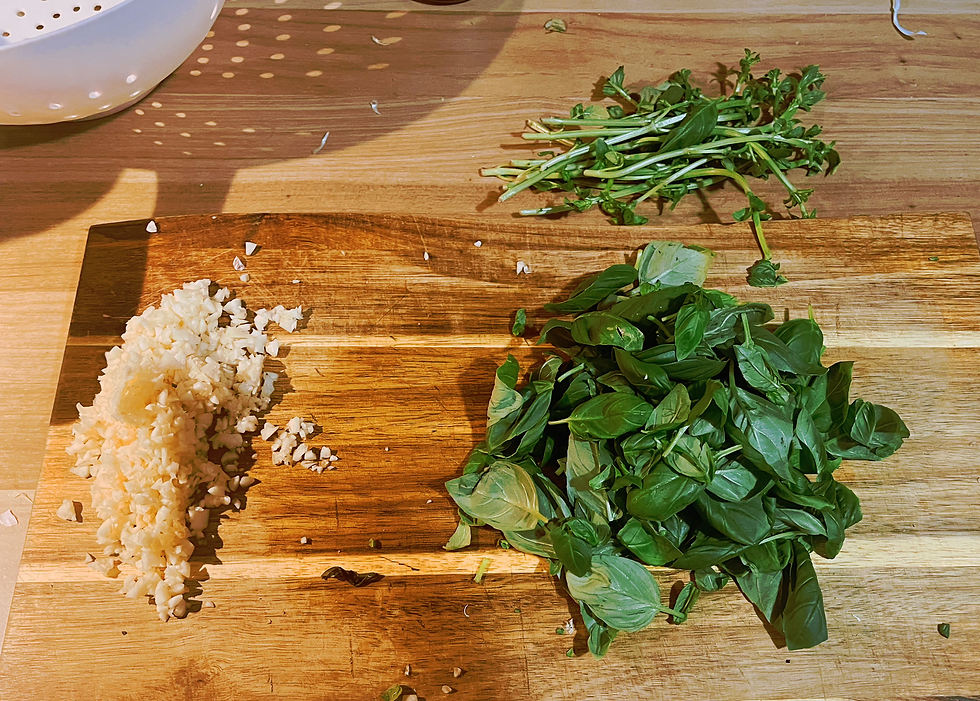
While the oil is heating up, pick your fresh basil leaves from their stems. When you are done, you should have a yield similar to the one shown above. If you have a use for your basil stems, save them, but otherwise you can throw them in the trash once youve grabbed as many leaves as you can.

Of course, it's very important to rinse off all fresh produce used in your recipe. Some people have a vegetable/fruit wash or spray that they use, but personally I rely on plain old water. Also important for this recipe is to remember to dry off your fresh produce before putting it in a pan. Droplets of water react to hot oil by spitting and spattering all over the place. Take a paper towel or dry, clean rag and pat your washed produce dry before throwing it in a pan.

Grab all but a bit (shown above) of garlic and place it into the shimmering olive oil on your stove. You will use the leftover garlic for another part of the recipe, so make sure you place it to the side and keep it safe!

The garlic will begin to darken and become aromatic. Watch the garlic cook to make sure it doesn't start to turn dark brown or black. Stir your garlic around with a spatula so it doesn't get too burnt in any one particular area! You are looking for the garlic to ultimately become a golden color, signifying that it's fully cooked (shown below.)

Once your garlic is almost completely golden, get ready to add your basil! Turn the heat lower (to around 2 or 3) and divide around 9/10ths of your fresh basil from earlier. My mom says that garlic and olive oil cooking with basil is the best smell in the world. I can't say I disagree with her.

Follow the same lead that you did with the garlic- leave a bit left over on the cutting board for later in the recipe. Stir the garlic and basil recipe with your spatula, again, to prevent anything getting singed.

When your garlic and basil mixture is ready to have tomatoes introduced to it, it will look something like this.

Use your can opener to open your tomato paste. I probably should've mentioned this before you cooked your garlic and basil. Oh well, worst case scenario, at this stage you can turn your stove eye down to "lo" or even "off" and nothing bad will happen if you're struggling with the can opener. Once you manage to get the top of your tomato paste, use a utensil to scrape as much as you can into your basil and garlic mixture.

Use your spatula to mush everything together until you get a mixture that resembles the one above. Keep this concoction on a low-ish temperature (3 or 4) until it begins to caramelize a bit, usually 10-15 minutes. Stir occasionally to make sure nothing gets too crusty.

This is also a good time to introduce salt to your sauce mixture. As shown above, I swirled my salt container around until the sauce was evenly covered with a layer of crystals. You will probably have to add more salt later, but this is a good place to start seasoning your seasoning.

When your sauce is ready to have the canned San Marzano tomatoes added, it will look something like this. Open your can of San Marzanos and dump them into the pot.

Mix everything up with your spatula, hold the spatula vertical and chop up the San Marzanos the best you can- it will be much easier later, but you might as well start off with things chopped up as much as possible.

Add a bit more salt, put the stove on low, and you have a base for a traditional marinara sauce. Of course, this recipe is a bit fancier, but you could technically stop here if you were a big fan of simplicity. If you added noting else to this sauce, you'd want to let it simmer on low or 1 or 2 for at least a few hours, stirring occasionally until the flavors matured enough to make a decent sauce. However! This website is devoted to a creamy sausage-y sauce, which I will be further elaborating on in Chapter 2: the Sausagening.


Comments